Nearly Free Upgrades to Plan Into a New Custom Home or ADU
Flush door tracks, recessed medicine cabinets, real window casing, outlets where you'll actually want them — a builder's list of details that cost little or nothing when they're planned before the concrete pour and framing.
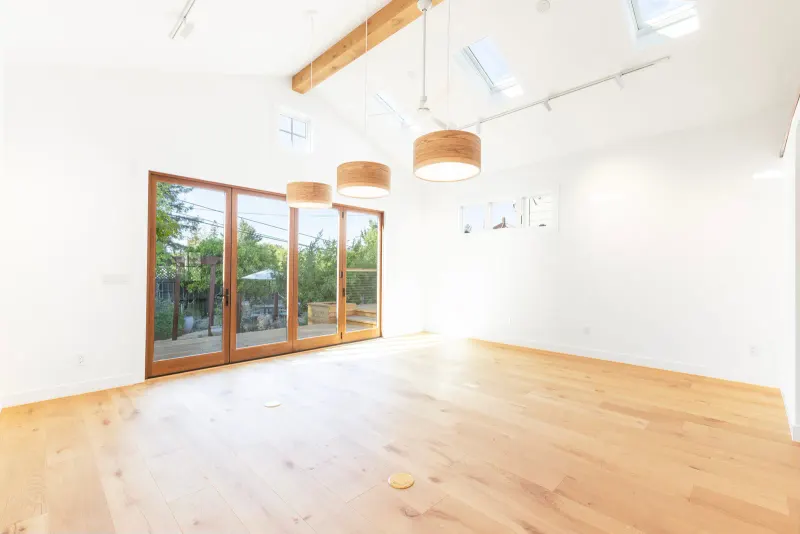
We’ve built many custom homes, taken plenty of houses down to the studs for full remodels, and completed more than 50 ADUs around the Bay Area. After that many projects, you notice something that surprises most clients: the details people thank us for years later usually aren’t the expensive ones. They’re the small ones — decided at the right moment, while the crew was already on site and the walls were still open.
That’s what this list is. None of these features needs a bigger budget. Most are just smart planning: a note on the plans, a conversation with the right trade at the right week of the project. What they all have in common is a deadline. Each one is nearly free before a certain stage of construction — the concrete pour, the framing, the electrical rough-in — and genuinely expensive after.
So we’ve organized them by that deadline. If you’re planning a custom home or an ADU, this is the kind of thinking to bring to your design meetings.
Before the concrete pour
Flush tracks for bifold and multi-slide doors
Big glass openings — bifold and multi-slide doors from manufacturers like LaCantina and NanaWall — have become one of the most requested features in the custom homes and ADUs we build, and for good reason. Fold the panels away and an entire wall opens to the yard, with light pouring in all day.
Here’s the detail most people don’t know: the track those panels ride in is a few inches tall. If nobody plans for it, the track gets installed on top of the finished slab and sticks up out of the floor — a ridge you step over every time you walk outside, in the exact spot the door was supposed to make disappear.
The fix costs nothing but coordination. Before the foundation is poured, we have the concrete crew form a recess in the slab exactly where the track will sit, so the track ends up flush with the finished floor. Inside and outside meet at one level, and the “wall that disappears” actually disappears. We’ve done this on many of these installations — you can see one in our Alamo ADU, below, where the accordion door folds completely away and the floor runs straight out to the patio with nothing to step over.
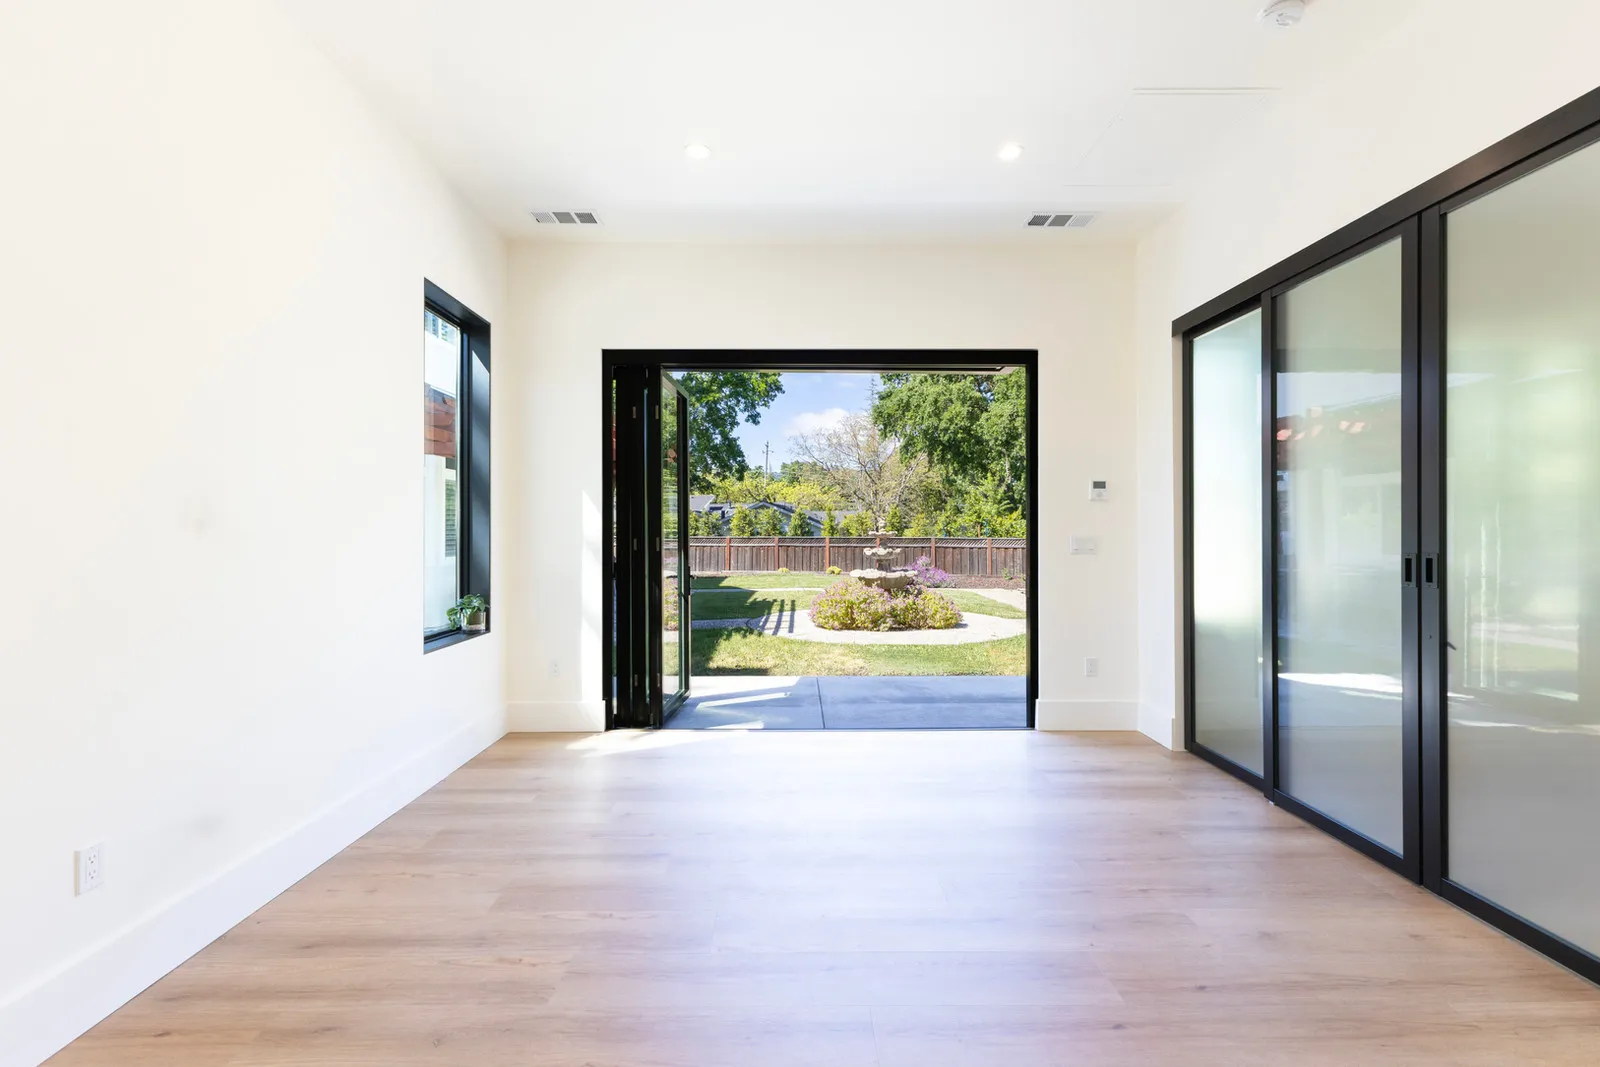
The recessed track in our Alamo ADU: the accordion door folds away, and nothing sticks up out of the floor.
A curbless shower entry
Same principle, different room. A shower with no curb — where the bathroom floor runs straight into the shower at one level — looks clean and modern, feels bigger than it is, and works for every age and mobility level. Building one requires the drain and the floor slope to be planned into the slab or subfloor from the start.
Fair warning: this is the one item on the list that isn’t nearly free. The recessed floor, the drain, and the extra waterproofing add a modest cost, and the drain layout has to be on the approved plans so the inspector can sign off on it — easy to fold into a new build’s permit, since you’re permitting everything anyway. Decided early, it’s a modest line item. Decided late, it’s concrete demolition.
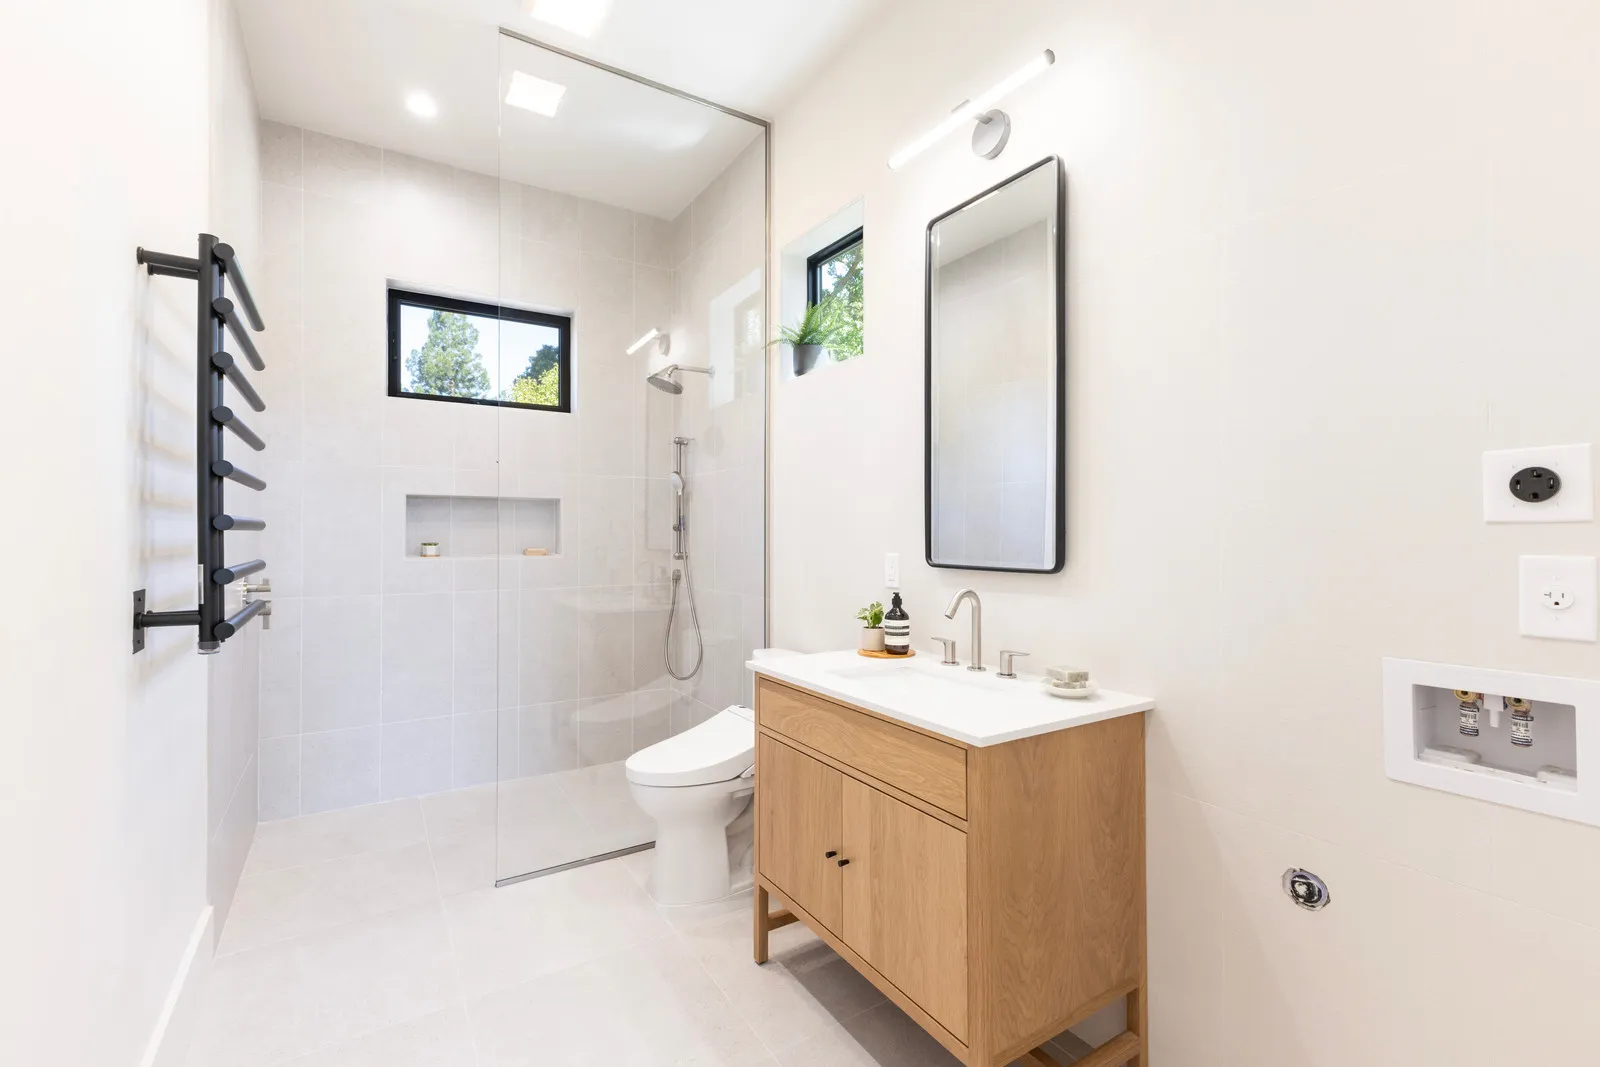
The same Alamo ADU: the floor runs into the shower with no curb to step over — and note the recessed niche, framed in during construction.
While the walls are open
Blocking for everything you’ll hang later
During framing, it costs almost nothing for a carpenter to nail flat pieces of plywood or lumber — called blocking — between the studs. That solid backing is what lets you later mount a TV, a floating vanity, towel bars, curtain rods, heavy artwork, or grab bars exactly where you want them, anchored into solid wood instead of hollow drywall.
We ask clients to walk each room with us before drywall: where will the TV go? Which walls get shelves? Might anyone ever want a grab bar in this bathroom? Ten minutes of conversation, a few dollars of scrap lumber — and every future project in that house gets easier.
A recessed medicine cabinet
A mirror cabinet that sits inside the wall instead of hanging off it keeps a small bathroom feeling open and gives you storage that a flat mirror doesn’t. The catch is that the cabinet occupies the space between the studs, so the framers need to know about it — they’ll frame the opening, and keep pipes and wires out of that bay. Tell us at design time and it’s free. Discover it after tile, and it’s a remodel.
Pocket doors where a swinging door eats the room
In bathrooms, pantries, laundry closets, and offices, a standard door swing can consume ten square feet of usable floor. A pocket door slides into the wall instead. The frame hardware costs a bit more than a standard door, but in a compact ADU those reclaimed square feet are some of the cheapest floor space you’ll ever buy — and a pocket door is only simple to install while the wall is being framed.
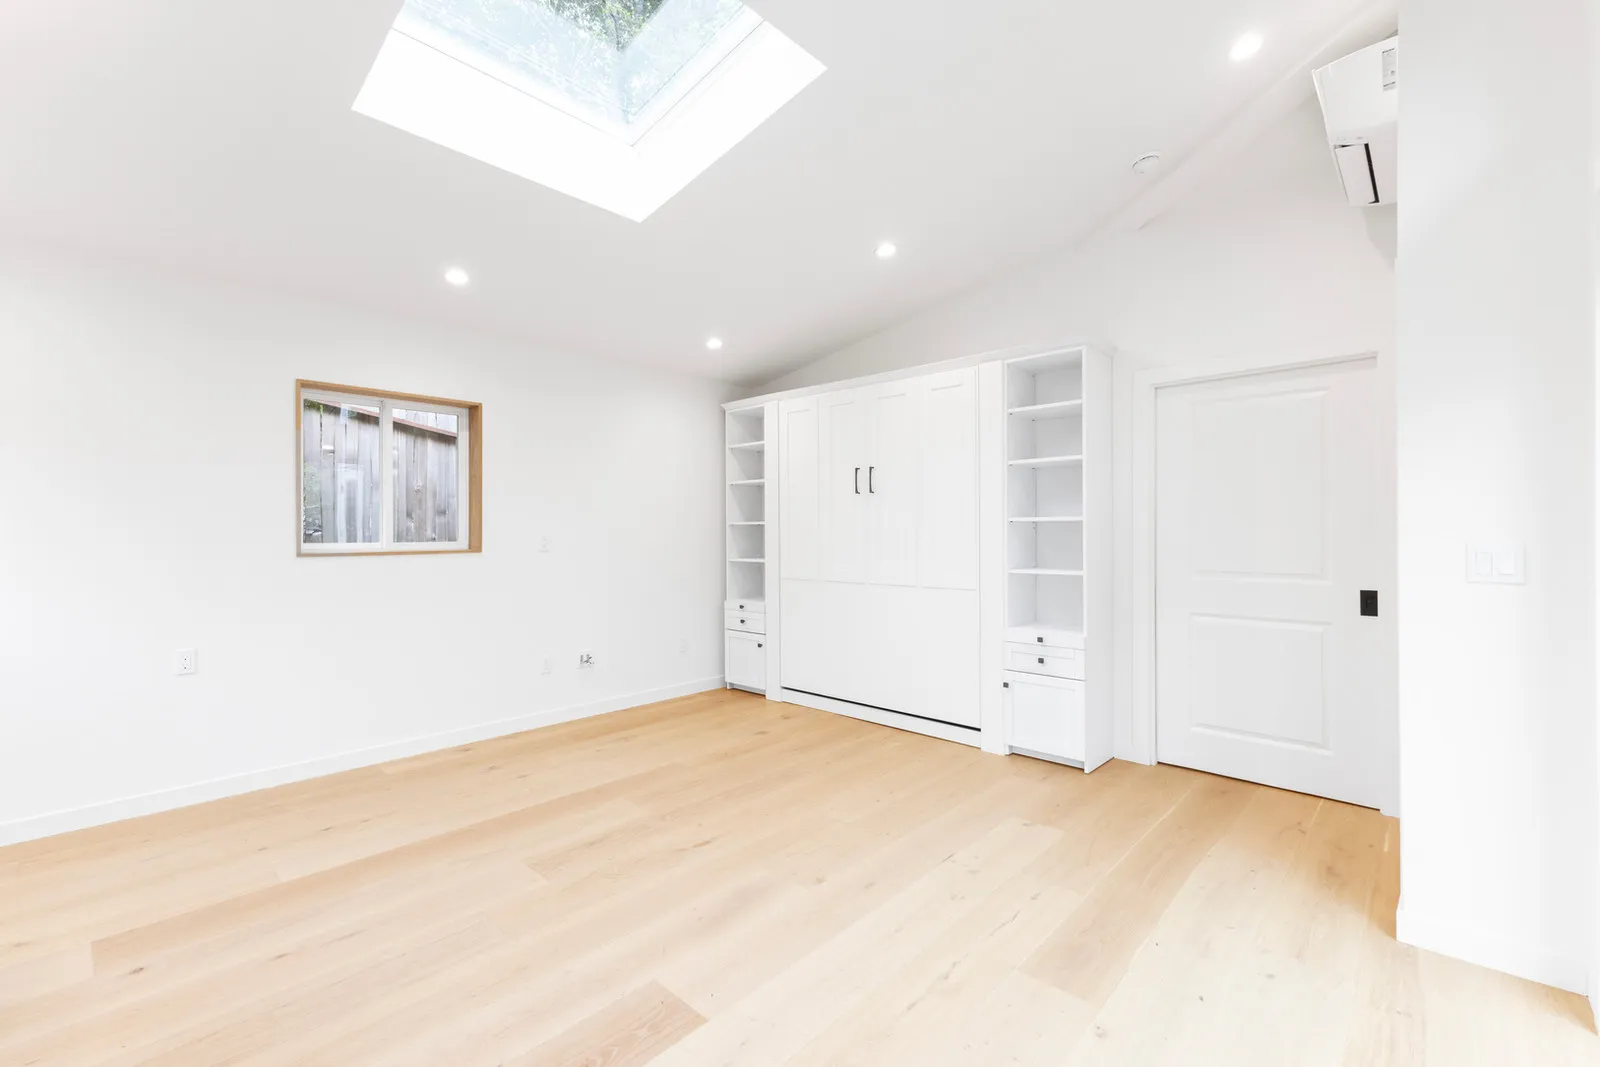
In our San Anselmo ADU, a pocket door slides into the wall between the room and the bathroom — no swing to work around, which is exactly what lets the built-ins sit right beside it.
Shower niches
A recessed shelf in the shower wall — framed in during rough construction, waterproofed, and tiled with the rest — means shampoo bottles never sit on the floor or balance on a corner caddy. It costs essentially nothing beyond deciding where it goes. We think every shower should have one, sized generously — there’s one in the Alamo bathroom photo above.
At electrical rough-in
Outlets where you’ll actually want them
Building codes set the minimum number of outlets. A new build is your one chance to think past the minimum, because every outlet is cheap while the walls are open and annoying to add after.
A real example: a client wanted a movable island table next to their kitchen — sometimes a workspace, sometimes extra counter for entertaining. So we installed a floor outlet right under where the table lives. Now a coffee maker or a mixer works on the island with no extension cord snaking across the kitchen floor.
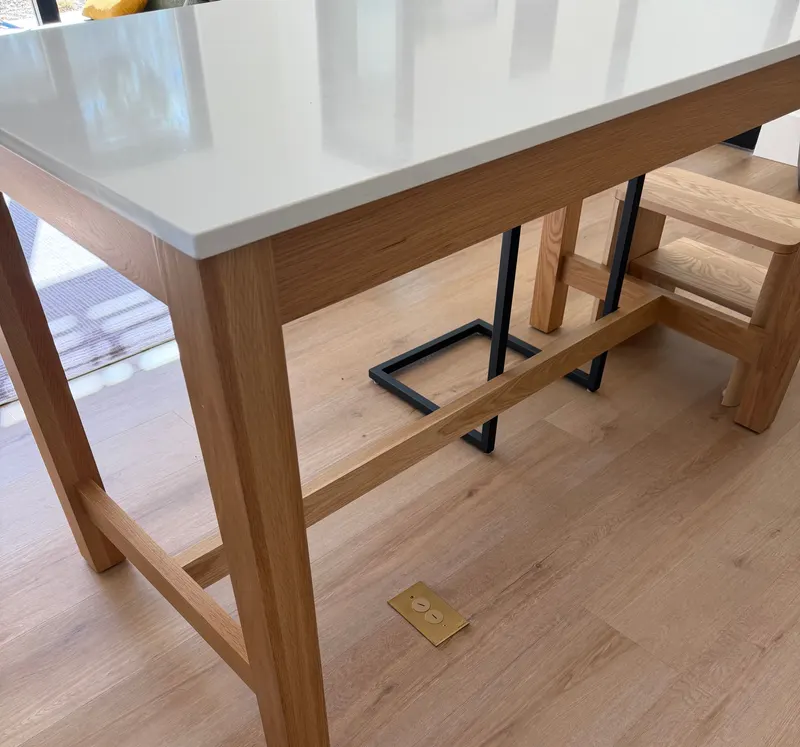
The brass floor outlet sits flush in the floor under the movable island table — power for the table, no cords across the kitchen.
A few spots we regularly suggest that people rarely think of:
- In the roof soffits — the overhangs under the eaves. Outlets there power security cameras and holiday lights with no visible cords. Put them on an interior switch and your holiday lights turn on from inside the house.
- Directly behind the TV — at mounting height, so a wall-mounted TV hides its own outlet and no cord runs down the wall. Pair it with the blocking above.
- Bedside, kitchen counter, and desk locations — more than code requires, placed for how you’ll actually arrange furniture.
Empty conduit for the future
Conduit is just plastic pipe in the wall with a pull string inside — a path for wires you don’t need yet. While everything is open, we like to run empty conduit from the electrical panel to the garage or parking area (a future EV charger), from the attic or equipment closet to the media wall (whatever cable comes next), and out toward the yard (future landscape lighting, a spa, a shed). The pipe costs a few dollars. Fishing a new wire through a finished house costs a great deal more.
At finish carpentry
Interior window casing
Walk into most new construction and look closely at the windows: the drywall simply wraps into the window opening and stops. It’s the standard, cheapest way to finish a window, and it reads that way.
Casing — real trim surrounding the window on the inside — is one of the highest-impact finish upgrades there is, and since we’re building from the ground up, the carpenters are already on site to do it. You can use the window manufacturer’s matching casing, or have our carpenters build custom casing from any of several wood species, painted to match the trim or stained to show the grain. Either way, the windows stop looking like holes in the drywall and start looking like furniture. It’s a detail people can’t always name when they walk into a finished home — they just say it feels custom.
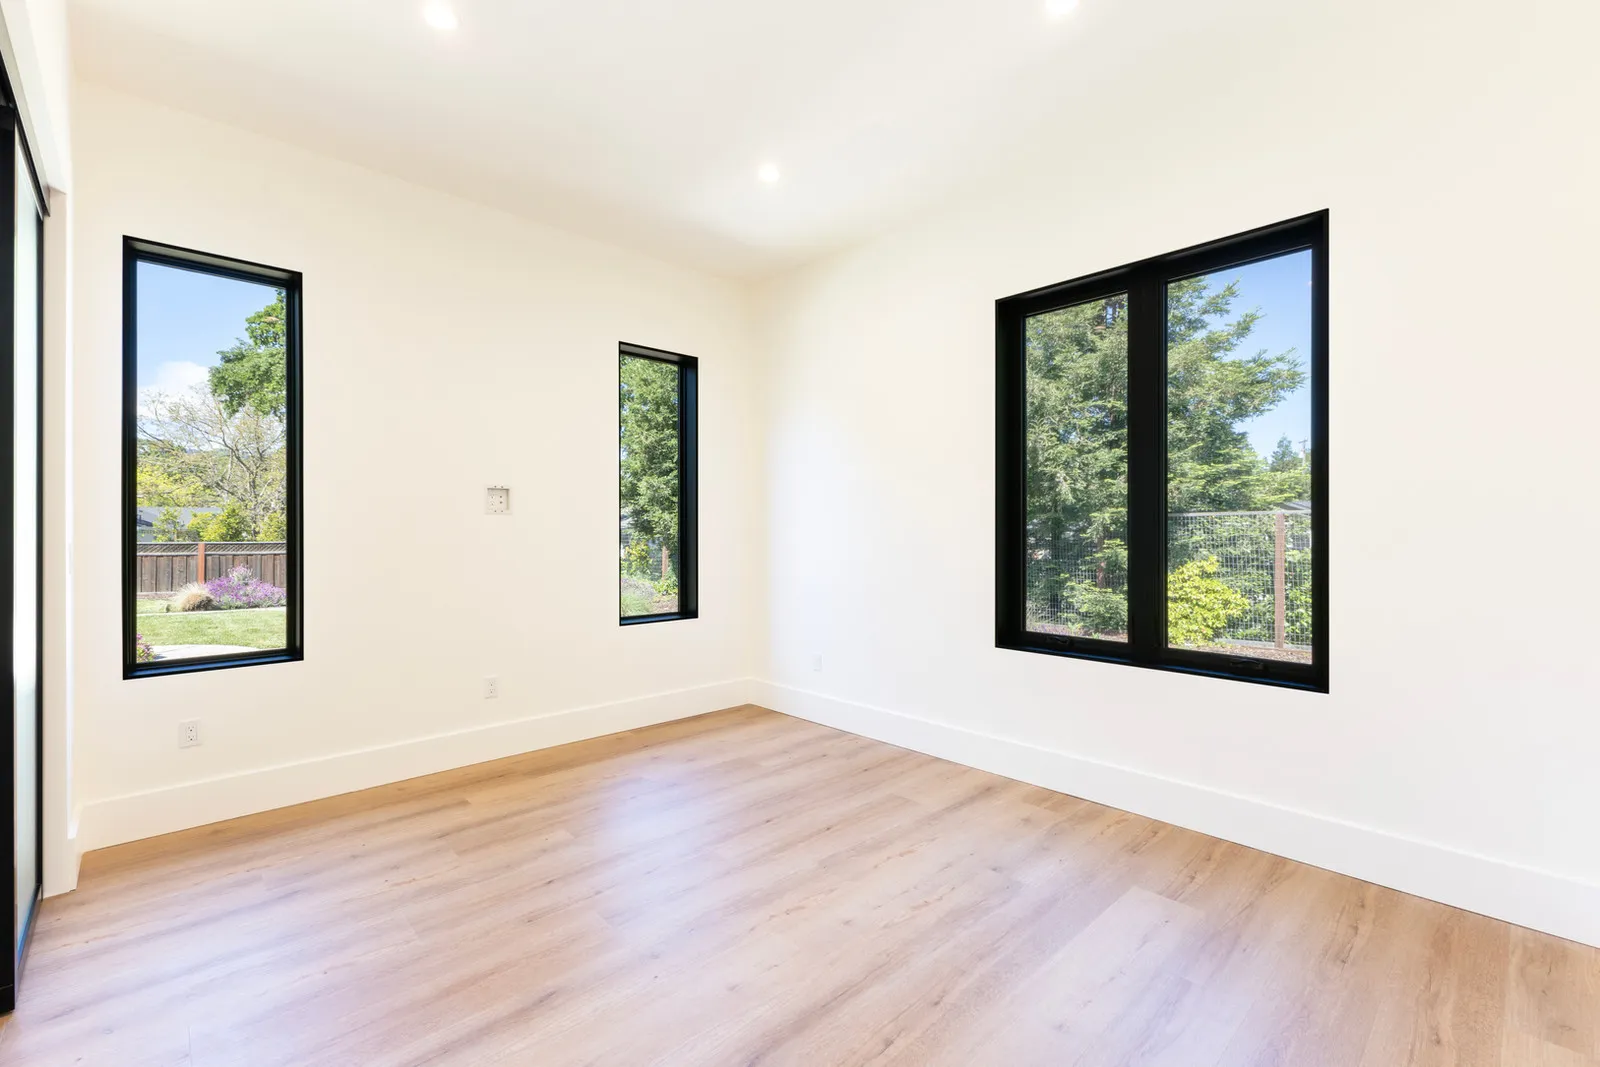
Slim black casing surrounds each window, so they read as crisp frames on the wall instead of openings cut into the drywall.
Common questions
Do these details add much to the cost of a new build?
Very little, and some add nothing at all. Most of them use labor that’s already on site — a framer adding backing, an electrician running one more box, a concrete crew forming a recess. What they all share is a deadline: they’re cheap before the pour or before drywall, and expensive after.
When do these decisions need to be made?
During design, and always before the relevant stage of construction. Slab details like flush door tracks and curbless showers have to be settled before the foundation is poured. Blocking, pocket doors, niches, and recessed cabinets are framing decisions. Outlets and conduit are locked in at electrical rough-in, before insulation and drywall close the walls.
Can I add these during a remodel instead of a new build?
Many of them, yes. A full remodel that opens the walls is the perfect time for blocking, recessed medicine cabinets, extra outlets, and conduit. The slab-level details are harder — recessing a door track or a shower into an existing slab means saw-cutting concrete, which is doable but no longer nearly free.
The bottom line
None of this requires a luxury budget. It requires a builder who brings these questions up at the right moment — before the pour, before the framing inspection, before the drywall — and a set of plans that captures the answers. That’s the real difference between a house that was built and a home that was thought through.
If you’re planning an ADU, our companion piece on small ADU design details covers the layout side of the same thinking — light, storage, and circulation. And if you’re still choosing who to build with, here’s who actually builds your ADU and why it matters.
Planning a custom home or ADU in the Bay Area?
Burton Builders has completed many custom homes, full remodels, and more than 50 ADUs — and we raise every one of these details at the stage when they’re still nearly free. Start a conversation about your project.